|
|
|

 |
What you will need:
|
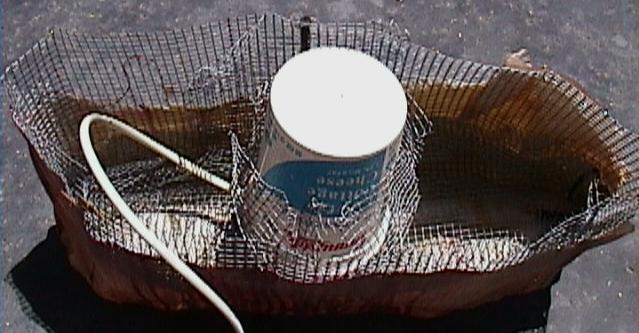
The first thing you need to do is construct the shoulder form out of chicken wire. Make sure that the actual neck is a cupped shape because you want the water to recycle itself back into the resivoir. You may want to build an entire upper torso, but I had a pretty good one that this concoctions fit onto. When your building the torso, mount the lid of your container directly under the neck. You will want to make sure that this is very accessable because you will need to get at it to fill and pour out the colored water. If you are using a mason jar I recommend first drilling a hole for your pump(use a piece of the 1in acrylic tubing to make sure it fits) and another for the airline. Then bolt it to your wire frame. Make sure the airline and pump mechanism will not be covered or restriced in any way.
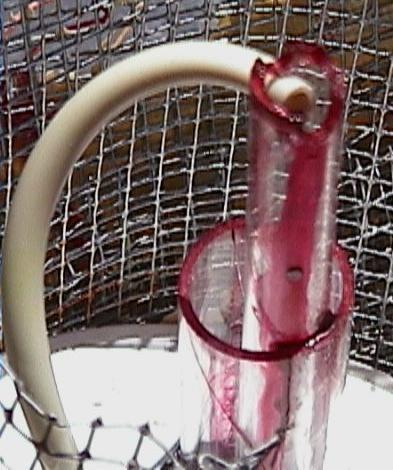
Next you'll want to build the pump mechanism. This mechanism works by air being pumped into the small tube therefore forcing the liquid up along with the air, giving you an extremly realistic gurgling action and sound. To build this pump you first need to cut the 1in acrylic tubing to reach up through the neck and down into your container(resivoir). Now cut the 3/8in acrylic so it butts up flush to the top of the 1in acrylic but run it to the bottom of your container(leave about 1/8-1/4in space from the bottom) Now drill a small hole about 1/4in up from the bottom of the 3/8 tubing big enough to fit your air hose, but make sure it's a tight fit. Don't glue the tubing together yet because acrylic breaks very easily and you don't want to have to keep running back to the store everytime it breaks. Once your hole is drilled push in the air tubing just to make sure it fits. Once it fits then you can take out the air tubing and glue the 3/8in tubing into the 1in tubing. Make sure it is dry before gluing and don't get it wet for atleast 24hrs. Once the glue is dry you can run the mechanism up thru the container's lid and out of the neck stump. Make sure that you can secure the container before going any further. Now run the airhose down through the lid and push it into the hole in the 3/8 tubing.
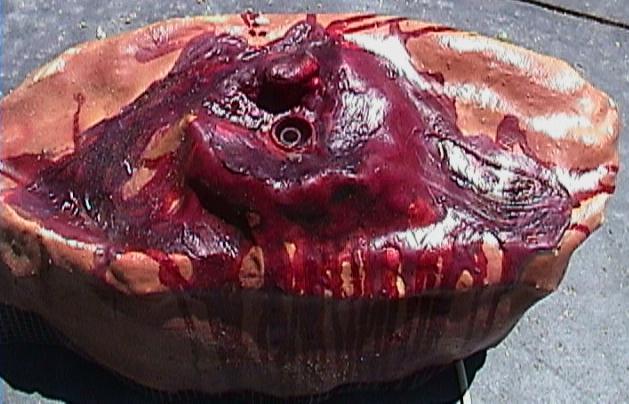
Now cover the frame with fiberglass cloth and brush on latex. Make sure that you cut a hole for the pump. Once you're done putting on the first coat then use an extra strip of cloth to seal around the 1in tube. This will be your neck stumps return, so you want to make sure no water is going to pour down the sides of the tube. Once all of the latex is dry, mix up a batch of skin colored latex and put another coat on. Once that latex is dried to a desired color, mix up another batch of blood colored latex and drip it down the torso. Allow the latex to dry for atleast 24 hours before adding water to the pump. Now that the latex is completly dry, add water to the container, hook up the aquarium pump and watch the blood spurt out of your new neck stump.
 |
 |
 |
|