Would you like to make this site your homepage? It's fast and easy...
Yes, Please make this my home page!


 |
What you will need:
- 2 Sheet of 3/8 plywood
- 1 Sheet of 3/4 plywood
- 20 feet of base board molding
- 14 feet of crown molding
- 6 8 foot pine boards (3 4in, 3 6in)
- 4 hinges
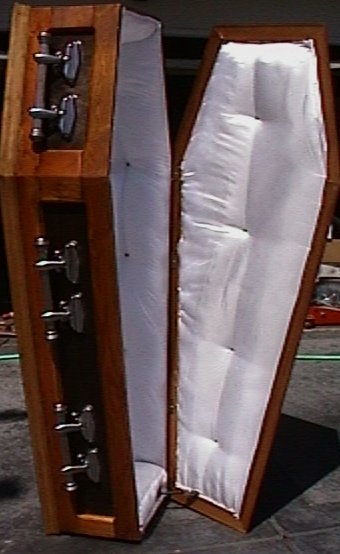
- 6 coffin handles from ABCO Platers Part #19 (273-81)Ph.(215)634-6983
- 2 quarts of wood stain (I used (1)"dark walnut" and (1)"golden oak")
- Satin or similar fabric
- Poly-fil or pillow stuffing
- 12in pneumatic cylinder (if you want the lid to open independently)
- Misc. saws, routers, clamps, nail gun, drill, screws, staples, etc.
-
|
|
I first want to start off by thanking Scott N. for his Coffin Plans.
I did do a few alterations to his plans but my coffin is basically the same as his original plans. I will go into more detail as I go along.
I followed all of Scott's coffin plans except for the original dimensions. His coffin is 17in deep where mine is only 14, which I think makes
it look a bit more proportioned. I also didn't use 3/4 mdf board. Instead I used 3/8 plywood for the base as well as the entire frame of the coffin.
When I originally built coffins, they were first built out of 2x4's then covered with masonite. They looked ok but were heavy and not detailed at all.
This coffin was built using no internal supports or braces, but to do so, I had to use a nail gun with 1.5in nails and alot of patients.
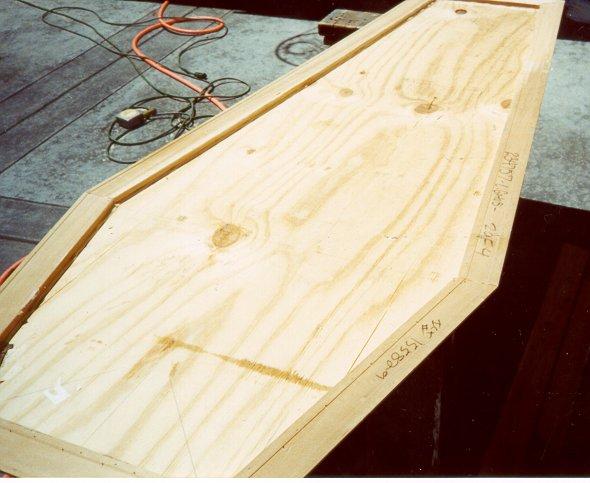
First I cut out the base with the exact same dimensions as Scott's. I also cut the lid out of 3/4in plywood with the same dimensions as the base.
In Scott's plans he used 3 12in pine boards that he glued together. I wanted to skip this step and avoid the hassle of gluing, clamping, and sanding the 3 boards together as well as I am using a pneumatic cylinder
to lift the lid and I was afraid that the pressure from the cylinder would eventually break the glue bond. If you are using a pneumatic cylinder to lift the lid I advise that you follow my advice.
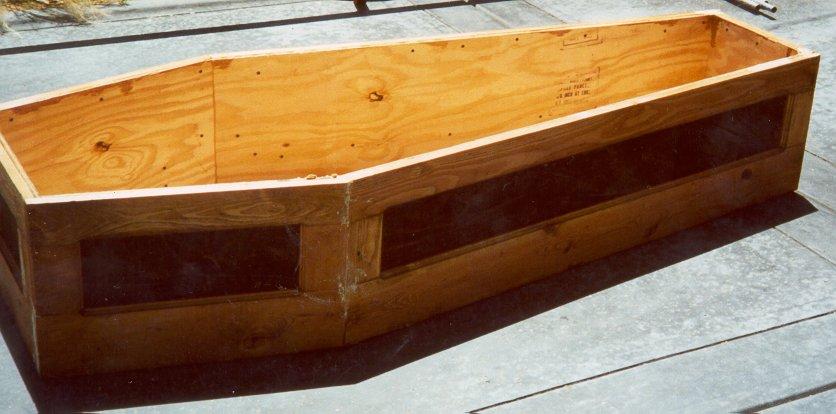
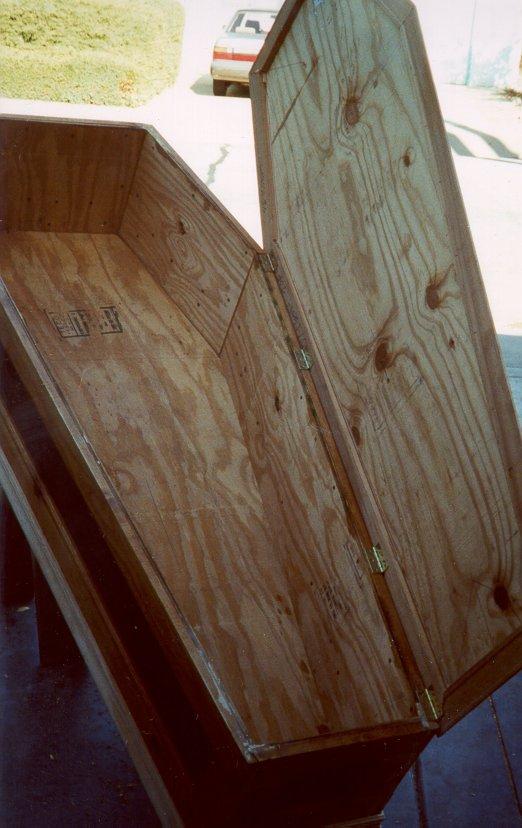
Now that we have our base and lid cutouts, I then cut the remains of the 1st sheet of plywood into 14in strips for the walls of my coffin .
Unless your a carpenter, I suggest cutting each piece independently and use 13-15 degree angles on all butted edges. Once you've cut all your panels and dry fitted them to ensure a correct fit
then you can start constructing. I used a generous amount of "External" wood glue around all edges that were to be nailed then proceeded to nail all of the sections to my base panel.
After all sections were nailed to my base, I flipped the whole thing over and proceeded to nail the tops of the panels together. Be careful if your using a nail gun because on a few of the angles
the nails wouldn't go in and they were flying all over the place. After that part is done, I recommend sealing all joints with wood glue and let the whole thing dry overnight. While it is drying
take your dark walnut stain and apply it to all surfaces that will not be covered by the pine boards(where the handles will be).
Now that your glue and stain are dry, start applying the pine board walls. I used the 6in board around the bottom and the 4in around the top. I once again used 13-15 degree angles on all of the joints.
Don't nail or screw any of these boards onto the plywood frame because we will need to router them shortly.
Once you have all of the base and top boards cut 1 8 foot strip of 4 in pine with a 15 degree angle down the entire edge. Now measure the distance between the 4 and 6in pine boards against the coffins frame.
Now once you have all of the pieces cut and they fit to your liking, you will nail the 6 sections(head, foot, and 4 sides) together so you can router them with the bit of your choice. I used the fanciest
one I could find. You will also be using this bit for the coffin lid. Now router all of the outside edges, and once that's done, you can glue and nail the sections to the plywood frame. Dry fit them first to ensure that you
didn't miss any spots while staining with the dark walnut. I advise doing one section at at time and work around the coffin.(don't nail one panel on then jump to the next side, work from one section to the next)
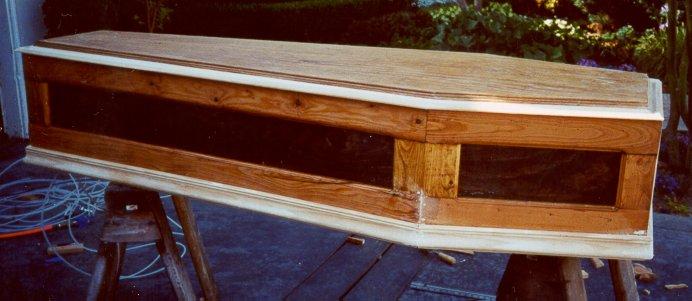
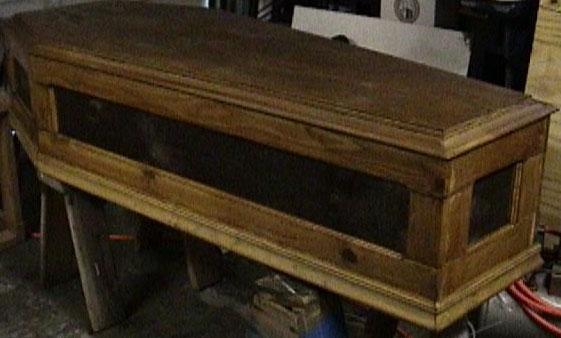
Now your coffin should be coming along nicely. You may want to build this away from the view of onlookers, I built mine in July and the 4 days I worked on it, I had numerous disgusted looks and a visit by the police.
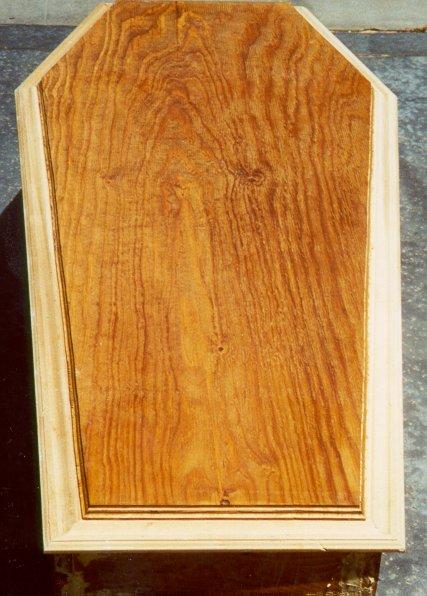
Now start applying the base board to the bottom of your coffin. Now take your coffin lid and router the top edge. Once you've finished this, you can start applying the crown molding to the inside of the lid. This was the hardest part of the
project and defienately the most time consuming. When you are purchasing your crown molding make sure that you purchase one that has atleast a 3/4 - 1.5in flat surface so you can nail it to your lid.
Now once you've glued and nailed the molding to the lid, you can mount it to the coffin and start staining with the golden oak. You can also go over the dark walnut with the lighter stain and it will fill in the gaps between the pine and plywood.